Monday, March 3, 2025

Saturday, August 12, 2017
Wired up, but not moving yet!
I finally have the truck completely wired up but I have a controller problem.
The light on the Curtis 1238 controller blinks a yellow light, which I think is good. But after pressing the accelerator the red light blinks and I read a code 47.

The 1238 manual has code 47 as an HPD sequencing fault and lists the following possible causes:
1. KSI, interlock, direction, and throttle inputs applied in incorrect sequence.
2. Faulty wiring, crimps, or switches at KSI (Key Switch Input), interlock, direction, or throttle inputs.
Also the Set/Clear conditions are:
Set: HPD (High Pedal Disable) or sequencing fault caused by incorrect sequence of KSI, interlock, direction, and throttle inputs.
Clear: Reapply inputs in correct sequence
Is this the way I have something hooked up, or is this a programming problem that will require having the controller reprogrammed?
I posted this in http://www.diyelectriccar.com/forums/showthread.php?t=187057
I need to figure this one out so I can see the motor spin.

Monday, March 6, 2017
Mounting the Curtis Controller
The Curtis controller provides the AC for my motor and that is the next step in my build. To mount the motor I decided to use some 3/16 flat aluminum stock that would sandwich in between the controller and a nice finned heat sink.
I also needed to weld some aluminum angle onto the flat stock to give it rigidity and a mount point to mount the whole assembly on the motor mount.
This is what the heat sink / mount looks like as I welded it. You can see the welds are done in 1" sections and then the stock is allowed to cool to prevent warping. I also clamped the heat sink onto the assembly while I welded in order to minimize warping.
 |
 |
| Cutting a template to fit for the braces. |
I then cut the aluminum braces with a skilsaw fitted with a metal cutting blade.

At this point I have the tray clamped to the motor mount and ready to accept the metal braces. I still need to weld flat ends onto the braces in order to bolt them to the tray and the motor mount.

Friday, January 13, 2017
Electric Motor
I found an electric motor on ebay that should work for my truck. I was told that it is an AC-46 motor.
AC-46 with shaft keyway and C face drilling and rear cover
Aluminum Heat sink for cooling controller
Curtis 1238-6501 Controller with programming for motor
The total was $2800. This was from Allan Bullock out of Livermore, CA

This is a picture of the motor mated to a transmission from a Ford Ranger.

AC-46 with shaft keyway and C face drilling and rear cover
Aluminum Heat sink for cooling controller
Curtis 1238-6501 Controller with programming for motor
The total was $2800. This was from Allan Bullock out of Livermore, CA

This is a picture of the motor mated to a transmission from a Ford Ranger.

Here is the motor all mounted in the truck.
Back to Square One
Well, I didn't like that heavy motor and CNG equipment in my truck. So I pulled it out and sold it. My new plan is to put in an Electric Motor and do a conversion.
So here is the truck sans motor again.

So here is the truck sans motor again.

Monday, May 19, 2014
Engine Dropped into Truck
I finally got the Engine into the 56 Ford Truck
 But now I'm having second thoughts about this engine configuration.
Here's what I need to do:
1. Get the steering linkage to clear the exhaust manifold
2. Cut out and modify the firewall to fit the engine (Distributor Hits).
3. Get the exhaust system to route properly
4. Get a gas tank that will fit properly and connect it to the engine.
5. Get the CNG tank to connect to the engine
6. Mount and connect the computers
7. Brake system connections
8. Cooling system connections
9. CNG wiring connections
10. Airconditioning system connections
11. Power Steering system connections
12. Battery Mounted and connnected
13. Transmission driveline
14. Transmission Linkage
15. Transmission wiring.
All this and I feel a bit overwhelmed.
I'm thinking about throwing away the engine and starting over with a 80mile range electric system.
Here's what I need to do:
1. Get the steering linkage to clear the exhaust manifold
2. Cut out and modify the firewall to fit the engine (Distributor Hits).
3. Get the exhaust system to route properly
4. Get a gas tank that will fit properly and connect it to the engine.
5. Get the CNG tank to connect to the engine
6. Mount and connect the computers
7. Brake system connections
8. Cooling system connections
9. CNG wiring connections
10. Airconditioning system connections
11. Power Steering system connections
12. Battery Mounted and connnected
13. Transmission driveline
14. Transmission Linkage
15. Transmission wiring.
All this and I feel a bit overwhelmed.
I'm thinking about throwing away the engine and starting over with a 80mile range electric system.
Donor Engine
I decided to do something different for the engine for the truck. It's a Chevy 350 (5.7L) from a 2000 3/4 ton utility truck that ran dual fuel. Yeah that's right. I am planning on putting a CNG motor into this old truck.
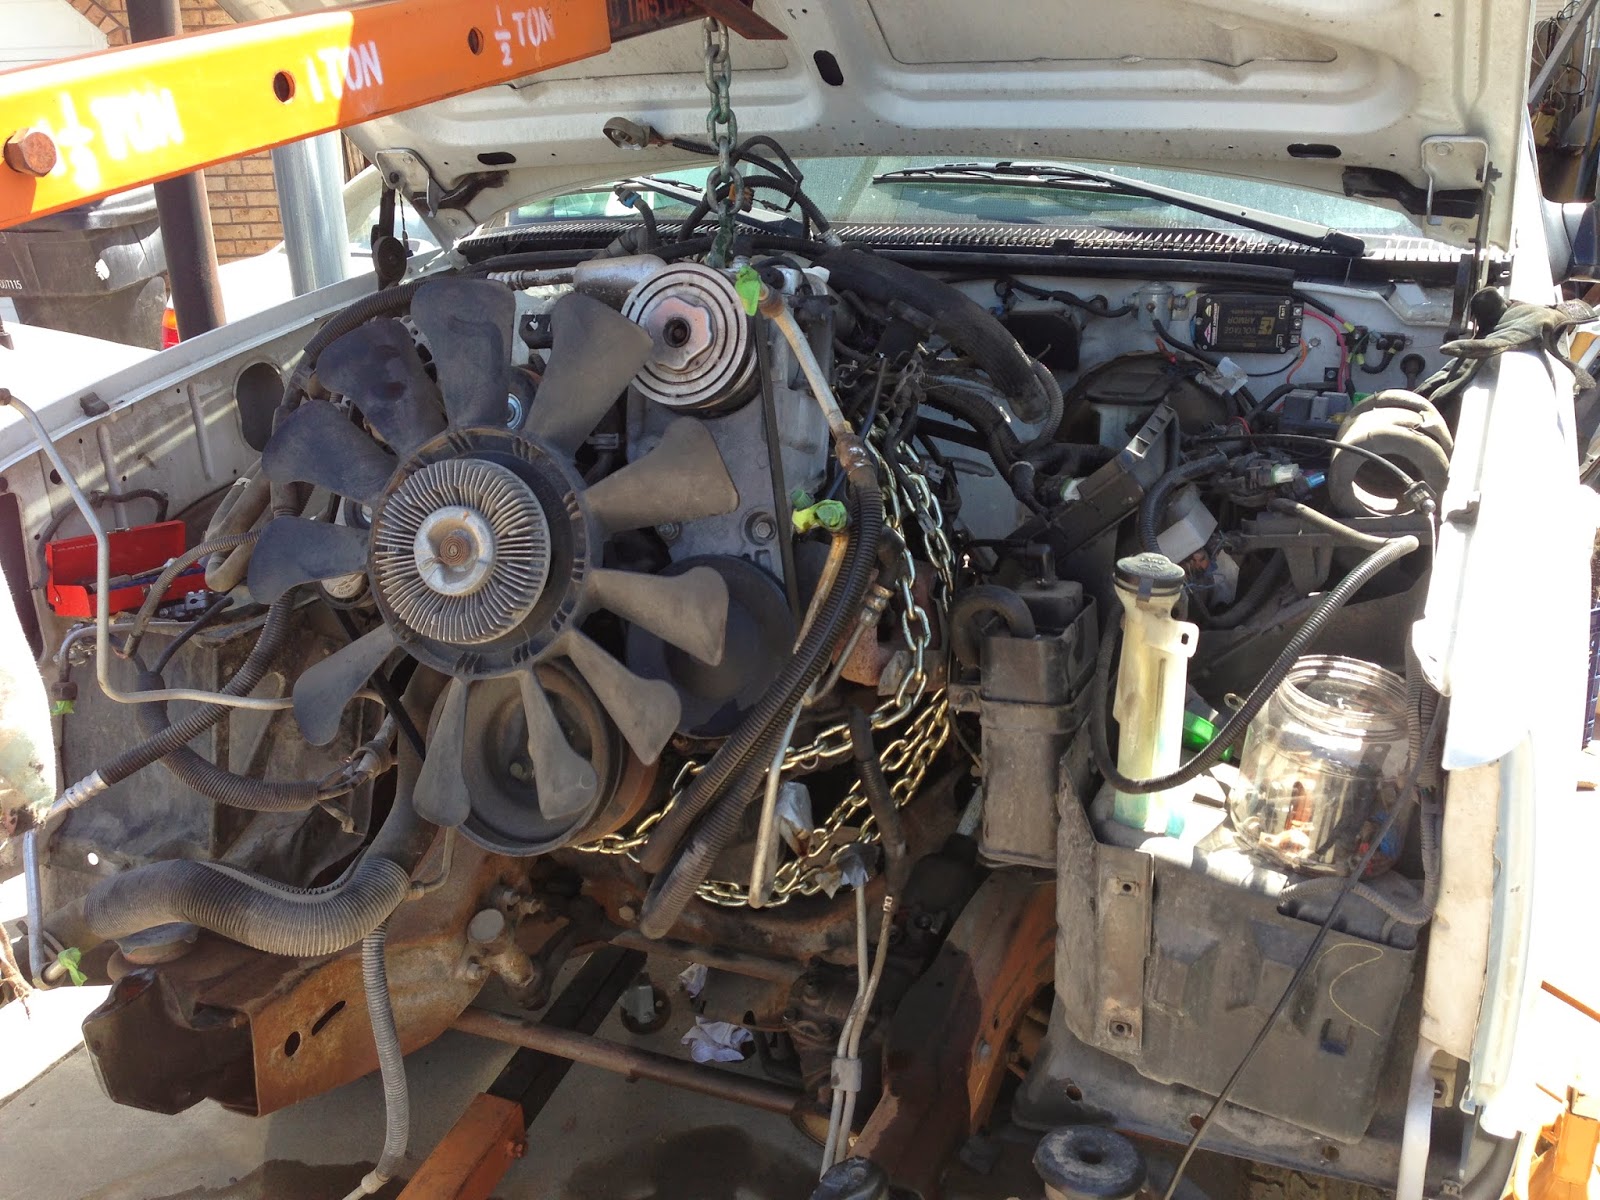 This setup has a 4L60E automatic transmission.
It will be a lot of work I hope its worth it.

It will be a lot of work I hope its worth it.
Corvette Front Suspension
As stated in my previous post, I was afraid that the Volare front-end that had been installed in my project truck was not a good solution.
It looked like it was put in wrong. So using a plasma cutter and a grinder I cut that mess away and sent it to the recyclers.
Then I ordered a front corvette suspension kit from Flat Out Engineering.
 This was not cheap because on top of the kit, I had to buy the corvette suspension from a salvaged corvette.
But now the front suspension problem is solved.
Now to put in the engine and set up the steering.
It looked like it was put in wrong. So using a plasma cutter and a grinder I cut that mess away and sent it to the recyclers.
Then I ordered a front corvette suspension kit from Flat Out Engineering.
But now the front suspension problem is solved.
Now to put in the engine and set up the steering.
Sunday, July 8, 2012
Volare Fail
A little history...
I bought this truck in 1996 as a basket case. Robert, the proprietor of the junkyard promised me that the Volare clip was done right. He also told me that he would provide an engine for me. All for a thousand bucks. Sounded pretty good.
The truck sat on the Farm for a few years, then in my backyard for 11 years.
In 2011 I moved it to the garage and started working on it.
I began working on rebuilding the volare clip because the rubber was rotted and the A-arms were rusted.
I noticed that the volare clip was welded in differently than I had seen before...
Yeah, that photo above shows how the clip was welded in. I don't worry too much about the height, because I really don't want the truck stance lowered. I want a stock look.
But I worry about the rake angle. I'm not an expert on suspension, but it seems that the rake angle would be negative on this clip. Also, it makes me wonder if whoever welded this in, knew what they were doing because it's not what I have seen and I know the templates for doing this have the fram notched at the bottom and the clip fit into the frame rails like the photo below:
Now look at the Volare I have to deal with. Instead of notching the frame from the bottom, the top was notched to fit the A-arm. So if I redo this, I have to fix the notch in the top of the frame.
Maybe the way the volare was put in here will work, I don't know, but with the negative rake, there could be more handling problems than I want to deal with, specifically when a bump is hit, instead of pushing the a-arm up the force will not make the shock as active. I guess you get the same effect on leaf springs to some degree. They are on a 0 degree rake.
I might leave the volare as is and finish the truck. If it handles ok at the stance that I like, then I'll be ok. If not then I can redo the volare.
If you have any experience with either of these two clip installs, please comment. You might save me some time and gain some good karma.
I bought this truck in 1996 as a basket case. Robert, the proprietor of the junkyard promised me that the Volare clip was done right. He also told me that he would provide an engine for me. All for a thousand bucks. Sounded pretty good.
The truck sat on the Farm for a few years, then in my backyard for 11 years.
In 2011 I moved it to the garage and started working on it.
I began working on rebuilding the volare clip because the rubber was rotted and the A-arms were rusted.
I noticed that the volare clip was welded in differently than I had seen before...
 |
| Two weld lines are visible because a strip was welded in to fill the gap. (Click to enlarge) |
But I worry about the rake angle. I'm not an expert on suspension, but it seems that the rake angle would be negative on this clip. Also, it makes me wonder if whoever welded this in, knew what they were doing because it's not what I have seen and I know the templates for doing this have the fram notched at the bottom and the clip fit into the frame rails like the photo below:
 |
| Correctly Notched frame with Volare installed (credit: Notes on a Volare Front Clip ) |
Maybe the way the volare was put in here will work, I don't know, but with the negative rake, there could be more handling problems than I want to deal with, specifically when a bump is hit, instead of pushing the a-arm up the force will not make the shock as active. I guess you get the same effect on leaf springs to some degree. They are on a 0 degree rake.
I might leave the volare as is and finish the truck. If it handles ok at the stance that I like, then I'll be ok. If not then I can redo the volare.
If you have any experience with either of these two clip installs, please comment. You might save me some time and gain some good karma.
Sunday, January 29, 2012
Cleaning the bottom

Last summer I finally pulled the cab of my truck off of the frame and started cleaning up the disgusting mess that was in there. There were about 20 wasp nests in the cab. They were everywhere. Up under the dash, in the window frame spaces in the door, in the defrost duct work, the glove box, argh! Stupid wasps. I eradicated their living spaces.
I pulled the cab off using my engine hoist and a 6x8 timber and I put it on my trailer and hauled it to the local sandblaster. The operator told me that he might warp the sheet metal and that it would cost over $200. That was more risk and more money than I had imagined, so I decided to do my own work. I have a little sandblaster and the tools to grind off the rust so I am taking my time and being careful.

Here I am welding the crossmember to the new rocker panel. One of the final steps in replacing the old rusted-out rocker panel.
I started cutting out many of the rusted out spots and replacing them with new metal. I used my old MIG welder for most of the patching. The MIG welder is fast, but I prefer the finish the TIG welder leaves. Less grinding with the TIG, but in this case I don't mind the thicker welds under the cab.

I am grinding off all the old rust and undercoating to prepare for fresh paint and undercoating. The old undercoating is over 50 years old and its dry and flaky so it's time to be freshened up.
At this point in my truck project I am grinding off the rust from the bottom of the truck. I have patched a lot of things on the cab and mounted the cab on a wheel frame. I'd like to build a rotisserie, but for now I just roll the cab and work on the bottom.
Sunday, January 1, 2012
Why I Like Old Trucks

My dad's was not this nice, but the same style
It was green and big. Something about that truck just seemed trustworthy and honest. Back in 1966, it was my dad's 17 year old truck. Yeah. A 1950 GMC pickup.
I thought it was a really cool looking truck. And it was green, my favorite color.
Soon after, dad traded in the GMC Truck for a new 1966 ford pickup. While it was nice, it wasn't as cool looking.
I still like the old trucks. My favorite is the 56 Ford Pickup. I own two of them, neither of them runs. I had the money to buy them, but no time to restore them.
In 1992 I ordered a brand new 4-wheel drive Chevy pickup in electric blue. I really liked that truck, but I only kept it for 4 years. I sold it because I wanted to buy a 56 Ford pickup. I found one in California. So I sold the truck and was about to go pick up the 56 Ford pickup in California. I was living in Spanish Fork, Utah.
There were several problems that would see me unable to complete my objective.
1. I called the guy in California. He changed his mind. He decided to keep the truck.
So I went out to California and I couldn't find any decent trucks in my price range, $5000.
I drove some that were just barely driveable. Some real hack jobs. Finally I found one that ran. It had a 390 in it. I bought it for $1200.
It didn't drive that well. It wandered. The steering gear was shot. The top speed was about 60mph and even at that relatively safe speed, a bump in the road would cause it to veer into the next lane. There was about a half a turn in the steering wheel of play.
In Mesquite Nevada at the Oasis I stopped for the night. In the morning I got up and tried to start the truck. It wouldn't start. The engine turned over fine, but it wouldn't start. It took me a day and a half to figure out that I wasn't going to be able to start it. I checked the three main things: Compression, Gas and Spark. All three were working. I knew it was probably the timing belt, but I didn't want to work on that in a casino parking lot in 100 degree weather. So I rented a U-Haul truck and a dolly and pulled the truck home.

The Truck from California
Yeah. It was the timing belt. I fixed the timing belt and drove the truck for a year. Then I went to fill the truck up one day. After I filled it up it started smoking. I made it to work and then had to tow it home. I found out that the Spanish Fork Flying J gas station had accidentally filled their premium tank with diesel. That was the last time I drove that truck. I drained the tank and got it started, but decided it needed to be restored. So I have it on the side of the house waiting.
And there it will wait for a while longer because I am restoring another truck that I bought in 1996 from a junk yard. This truck has a Volare front clip and no motor. That is the truck that I'm restoring first.
Why that one? Well without a motor it is more like a blank sheet. I can start from scratch.
This is the beginning of my restoration adventure.

This truck is project #1
Subscribe to:
Posts (Atom)